How to Germinate Rare Tropical Seeds: A Step-by-Step Guide
Germinating rare tropical seeds can feel intimidating, especially when you have only one or two seeds of a species that took months to find. However, successful germination does not always require complicated equipment. In most cases, it comes down to understanding the species, using fresh seed, maintaining the right moisture level, and avoiding unnecessary disturbance.
Because tropical seeds vary enormously in their biology, there is no single method that works for every species. Use the following process as a general starting point, then adjust it according to the specific plant you are growing.
Step 1: Inspect and Clean the Seed
Start by examining the seed carefully.
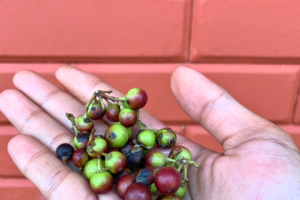
If the seed came from a fleshy fruit, remove any remaining pulp before planting. Fruit residue can encourage fungal growth and attract pests, particularly in warm and humid conditions.
Next, check the seed for obvious problems. Healthy seeds generally feel firm, while severely soft, collapsed, or foul-smelling seeds may already have deteriorated.
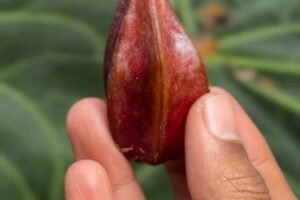
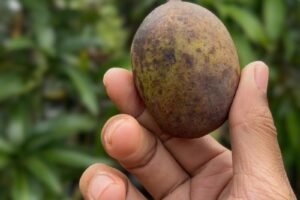
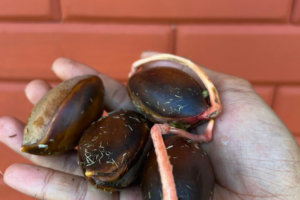
However, do not discard a seed simply because it looks different from what you expect. Tropical seeds come in many shapes, colors, and textures, so learn what healthy seed looks like for the particular species whenever possible.
Freshness also matters. Many tropical seeds lose viability quickly after harvest, especially species with recalcitrant seeds that cannot tolerate drying. Consequently, fresh seed often gives you a much better starting point than seed that has spent a long time in storage.
Step 2: Research Before You Soak
Soaking is a common germination technique, but it is not universally necessary.
Some tropical seeds benefit from a warm-water soak because hydration can soften the seed coat and initiate the germination process. Depending on the species, growers may soak seeds for several hours or overnight.
However, avoid treating soaking as a mandatory step.
Some seeds are sensitive to prolonged moisture, while others have specialized dormancy requirements that water alone cannot overcome. Therefore, research the specific species before deciding how long to soak it.
If you do soak the seed, use clean water and avoid excessively hot temperatures that could damage the embryo.
Step 3: Choose a Clean, Well-Draining Medium
Once the seed is prepared, choose a growing medium that provides moisture without becoming waterlogged.
A simple combination of sphagnum moss and perlite can work well for many tropical seeds. Other airy propagation mixes can also be suitable, provided they remain evenly moist while allowing sufficient airflow.
Avoid dense garden soil for delicate seeds. Heavy soil can hold excessive moisture around the developing root and increase the risk of rot.
The goal is simple: keep the seed hydrated without creating a stagnant, saturated environment.
Step 4: Plant at the Correct Depth
Planting depth matters more than many growers realize.
Some tropical seeds should sit close to the surface, while others perform better when partially buried. As a general rule, avoid burying small seeds deeply unless the species specifically requires it.
After planting, gently firm the medium around the seed so that it has good contact without compacting the growing medium.
For larger seeds, position them according to their natural orientation when reliable information is available. Some species develop roots and shoots from specific parts of the seed, making correct positioning useful for early development.
Step 5: Maintain Warmth and Humidity
Temperature plays a major role in tropical seed germination.
Many tropical species germinate well under warm conditions, often within a broad range around 24–30°C. However, the ideal temperature varies by species, so treat this range as a general reference rather than a universal rule.
A heat mat can help maintain stable temperatures, particularly in cooler environments. Likewise, a humidity dome or enclosed propagation container can reduce moisture loss.
Still, avoid creating a completely stagnant environment. High humidity combined with poor airflow can encourage fungal growth.
Consistency matters more than extreme conditions. A stable, moderately warm environment is usually more useful than repeatedly exposing the seed to large temperature fluctuations.
Step 6: Monitor Moisture Carefully
During germination, moisture management becomes a balancing act.
The growing medium should remain appropriately moist, but it should not remain saturated. Check the medium regularly and add water only when necessary.
If you use a sealed propagation container, remember that condensation does not necessarily mean the seed has enough usable moisture. Instead, check the medium itself.
At the same time, avoid repeatedly opening the container simply to check whether the seed has sprouted. Every disturbance can change temperature and humidity around the seed.
Step 7: Give the Seed Time
This is often the hardest part.
Some tropical seeds germinate within a few days, while others may require several weeks. Certain species can take considerably longer.
Therefore, do not assume that a seed has failed simply because nothing happens after a week.
Instead, research the expected germination period for the species and monitor the seed for signs of rot, mold, or deterioration. If the seed remains firm and healthy, patience may be the best approach.
Common Tropical Seed Germination Mistakes
Even experienced growers can lose valuable seeds by making small mistakes.
Using Old or Poorly Stored Seed
Many tropical seeds have limited storage tolerance. Buying old seed and expecting high germination rates can lead to disappointment.
Keeping the Medium Too Wet
More water does not necessarily mean faster germination. Saturated conditions can deprive developing roots of oxygen and encourage rot.
Using Excessive Heat
Warmth helps many tropical seeds germinate, but excessive temperatures can damage sensitive embryos. Always research the species before applying bottom heat.
Disturbing the Seed Too Often
Repeatedly digging up seeds to check for roots can damage fragile early growth. Once planted, give the seed time to develop.
Ignoring Species-Specific Requirements
Perhaps the biggest mistake is assuming that every tropical seed behaves the same way.
Some species germinate readily with warmth and moisture, while others require light exposure, scarification, temperature changes, specialized substrates, or other treatments.
The more unusual the species, the more important species-specific research becomes.
What to Do After Germination
Once the seed finally sprouts, do not immediately expose the young seedling to harsh conditions.
Keep the growing environment stable and gradually introduce more airflow and lower humidity as the seedling becomes established.
Provide suitable light, but avoid intense direct sunlight until the young plant has developed enough foliage to handle it.
At this stage, the goal is no longer simply germination. You are helping a delicate seedling transition into a healthy young plant.
Start With Fresh, Properly Handled Seeds
Learning how to germinate tropical seeds is ultimately about understanding the biology of the species rather than following one rigid recipe.
Start with fresh seed whenever possible. Clean it carefully, research whether soaking is appropriate, use an airy growing medium, maintain stable warmth and moisture, and give the seed enough time to complete its natural germination process.
Most importantly, remember that rare seeds deserve careful handling. When you only have a few seeds available, patience and preparation can make a significant difference.
Explore our rare tropical seed collection and find unusual tropical species to grow from seed.